Road to Seamless Planning :: SAC Migration :: 3 :: Migration of content from the source tenant to the new tenant
Introduction
Following our journey toward seamless planning, we now focus on the migration process itself. This chapter covers the key steps required to transfer content from the source tenant to the new tenant efficiently.
5.3.4 Migration of content from the source tenant to the new tenant
Before starting this phase, ensure that:
- You have completed the setup outlined in SAC Migration 1.0.
- You have set up security settings as described in SAC Migration 2.0.
By following these preparatory steps, you can avoid common pitfalls and ensure a streamlined migration process.
5.3.4 Migration of content from the source tenant to the new tenant
This migration process includes the following key steps:
- 5.3.4 :: 001 :: Connections
- 5.3.4 :: 002 :: Export Content
- 5.3.4 :: 003 :: Check permissions
- 5.3.4 :: 004 :: Re-create import jobs:
5.3.4 :: 001 :: Connections
When migrating connections, there are two primary approaches:
- You can export connections from the source tenant and import these to the target tenant. Credentials need to be re-entered after the import since these are excluded from the export functionality for security reasons. Please check the connection settings after the import has been completed.
- If you prefer, you can create the connections newly in your target system instead.
For efficiency, we opted for export/import via Content Network, ensuring that all connections appeared in the target system. After importing, we manually re-entered credentials to restore functionality.
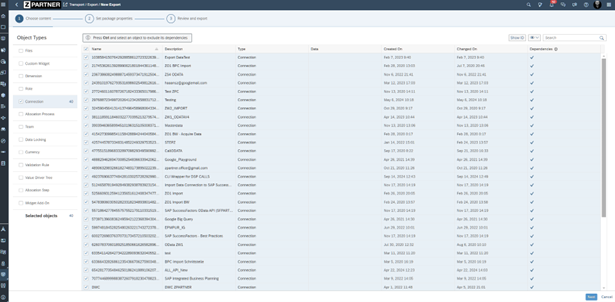
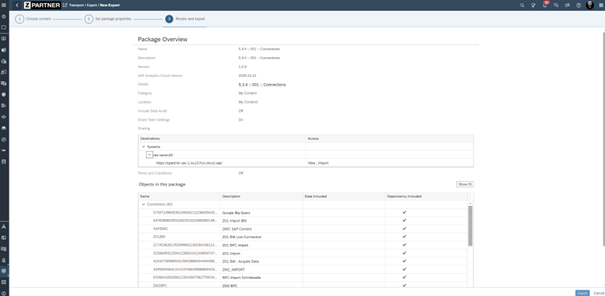
On the target system we simply imported the new Export out of the “Content Network”.

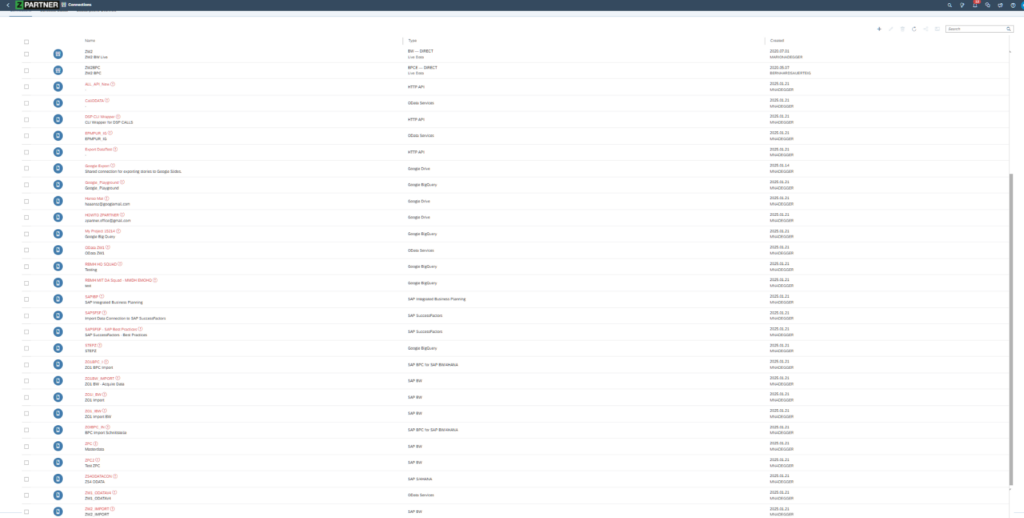
As described in the migration path all connections showed up in the target system.
Key Considerations:
- Ensure proper Cloud Connector setup: SAP Cloud Connector Setup
- Configure CORS settings for live connections: SAP CORS Configuration
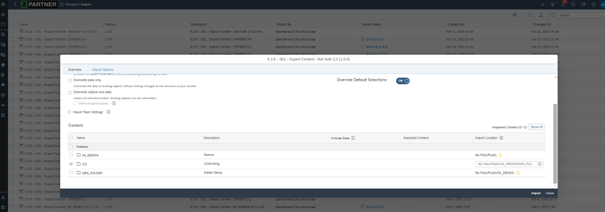
5.3.4 :: 002 :: Export Content
This chapter describes the export of your content and “transport” it to the new tenant. In the customer guide it is written the following
Start with adding business user content such as stories and Digital Boardroom presentations to your exports. Dependent content such as folders, models, and dimensions will be included as well. If you are using the Content Network (see Section 5.3.8), you can choose whether to include data for an import data model or not. If the model has a lot of data, you can exclude it to speed up the import process and save storage space.
If you are exporting to a file, we recommend leaving the data out and to refresh it from the original source, if possible. If you are using catalogs in the source system, then they must be re-created manually in target system.
If you are importing with files, you can import the content a second time to include the sharing settings for your content. During the second import, select Update Existing Objects and leave the other options off.
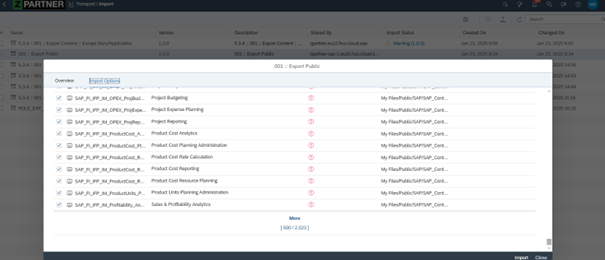
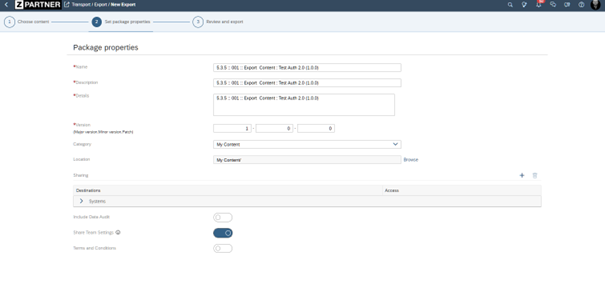
We started exporting every object in one step via “Content Network” and not using File Export. One reason was the important hint “The maximum file size when importing content as files in the Transport area is 100 MB.”.
Import into the target failed. At that point and we began to recognize that this task will take longer than expected. Migration of Story and Application to Story 2.0 is required, adding an additional complexity layer to the migration process.
How we deal with that will be described in the next blog.
To mitigate these issues, we proceeded by migrating folders first, ensuring proper permission structures were in place before importing them folder by folder.
5.3.4 :: 003 :: Check permissions
In customer guide the task is described as follows:
If you are using the Content Network, you will need to set up the sharing settings for your folders again after migration, as well as for any individual files with specific sharing settings. If you used file exports, check that the sharing settings are correct after the second import.
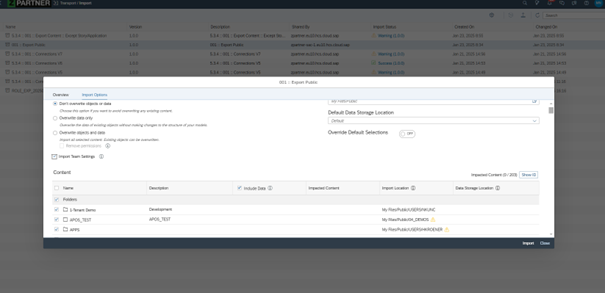
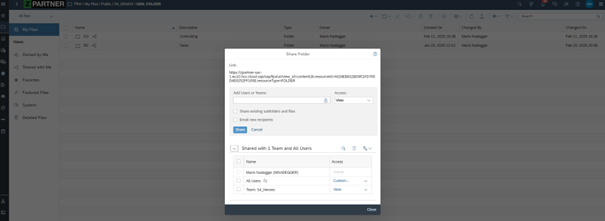
In that context we again go with “Content Network”. We tested this by exporting a folder („CO“) with different sharing levels to analyze what settings were retained. First, we exported only one folder named “CO” shared to one User (DEMO), one Team (Team S4_Heroes” and indirect shared “Team ZP_X000” from parent folder.
We created an export of the folder via “Content Network” and switched on “Share Team Settings”.
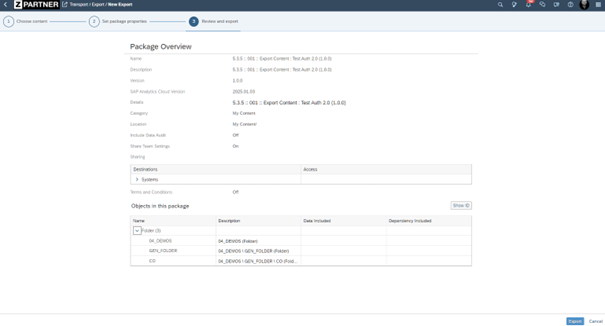
On the target system we only selected the “CO” folder for import including “Import Team Settings”
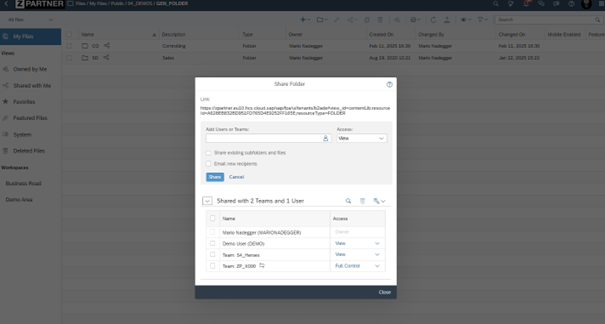
After importing our package the folder shows up in our new tenant. Only the direct shared Team (Team S4_Heroes”) was transported. Direct shared user or inherited shares were not considered.
Findings:
- Only direct team sharing was successfully transferred.
- Individual user sharing and inherited shares were lost, requiring manual reapplication.
To ensure a seamless transition, we manually reapplied missing team assignments in the target system. This step, although time-consuming, was essential in maintaining proper access control.
5.3.4 :: 004 :: Re-create import jobs:
Import jobs are necessary for data integrity, but they cannot be transferred via Export/Import. Instead, they must be manually recreated. Before we re-create import jobs we have to transport our import models into the target tenant.
To illustrate we have two examples with client and with data source connection
In our source system we have a nativ model with an import via excel file client.
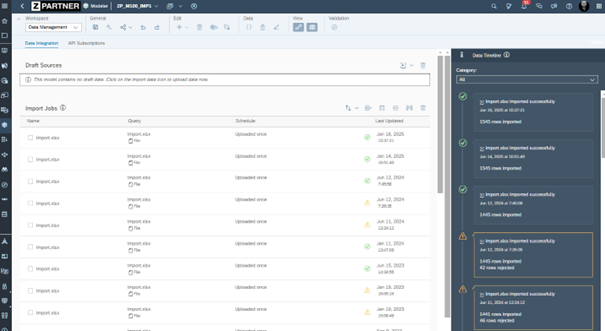
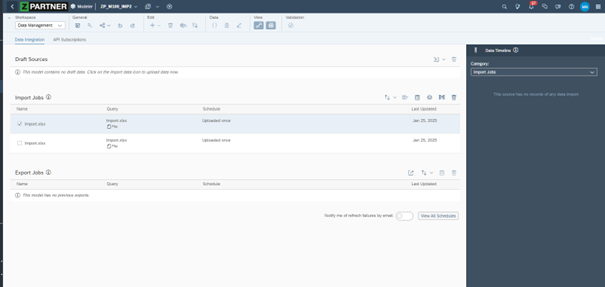
After transferring via “Content Network” there are still import jobs shown but without any logs.
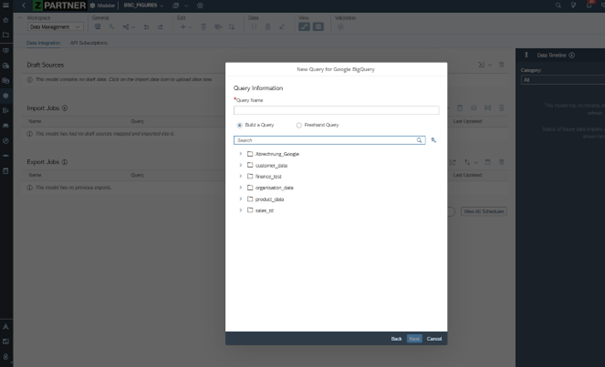
An other example in that context is an import job based on a “Google Big Query” data source exported and imported via “Content Network”.

In our target tenant no import jobs were shown after import.

We need to re-create around 10 import jobs in our target tenant using source as template.
Conclusion
After 8–9 hours, we successfully transferred connections, folder structures, and import jobs. However, content migration was delayed due to the Story 2.0 requirement, which introduced additional steps to the migration timeline.
Despite the challenges, following a structured and phased approach ensured that critical data was preserved, minimizing risks associated with tenant migration.
Key Takeaways:
✔ Clean up permissions beforehand to minimize unnecessary migrations and testing.
✔ Migrate Stories and Applications to Story 2.0 before starting the 30-day challenge to avoid bottlenecks.
✔ Use the source tenant as a template for re-creating import jobs to speed up the process and reduce errors.
✔ Ensure proper configuration of source system settings (Cloud Connector, CORS setup) to maintain seamless connectivity post-migration
By refining our approach and addressing unexpected roadblocks, we were able to create a more structured and efficient migration process.
Our next chapter will focus on Export/Import of tenant content, diving deeper into handling migrations effectively
Related Blogs
Author: Mario Nadegger
Mario Nadegger is a Managing Director and Business Intelligence Solution Architect, specializing in SAP Analytics Cloud (SAC). As a leading SAC expert, he has extensive experience in designing, implementing, and managing SAC solutions, including SAC Native Planning, reporting, and integration with SAP BW/4HANA. His strengths lie in strategic SAC architecture development, establishing design guidelines, and enterprise-wide SAC implementation. With his role as a managing director, he combines technical excellence with business leadership, driving innovative BI strategies. As an architect, team leader, and developer, he acts as a crucial bridge between IT and business, enabling digital transformation.