Road to Seamless Planning :: SAC Migration :: 2 :: Setup security settings
Introduction
As we move forward on our Road to Seamless Planning (https://www.zpartner.eu/road-to-seamless-planning-sac-migration-1-0-setup/), the next critical step in our SAP Analytics Cloud (SAC) migration is setting up security in the new tenant. Security configurations ensure the right users and roles are assigned, access is controlled, and Single Sign-On (SSO) is correctly implemented.
Referring to the migration path, the following steps need to be completed:
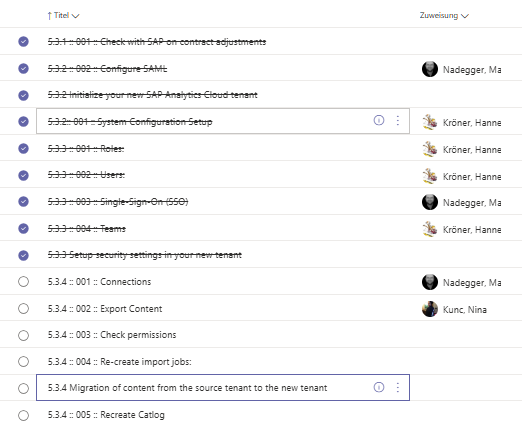
5.3.3 Set up security settings in your new tenant
- 5.3.3 :: 001 :: Roles:
- 5.3.3 :: 002 :: Users:
- 5.3.3 :: 003 :: Single-Sign-On (SSO)
- 5.3.3 :: 004 :: Teams
Pre-steps
Before starting migration, manually create a few users in the new tenant and assign them the „Admin“ role. This ensures administrative access to proceed with the setup.
Starting with the empty user list in the new tenant
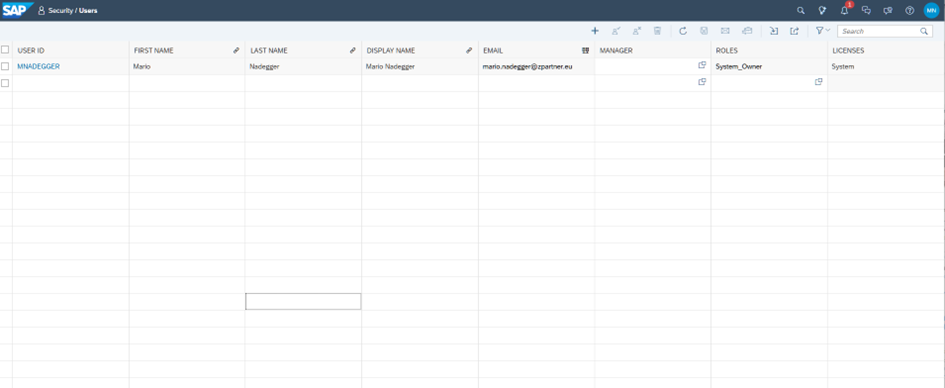
Steps:
- Navigate to Security > Users in your new tenant.
- Manually create the required users (e.g., Admin accounts).
- Assign the „Admin“ role to the required users.
- Verify that these users can log in successfully.
5.3.3 Setup security settings in your new tenant
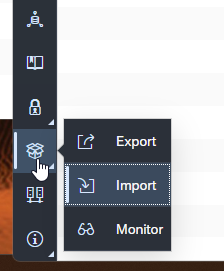
5.3.3 :: 001 :: Roles:
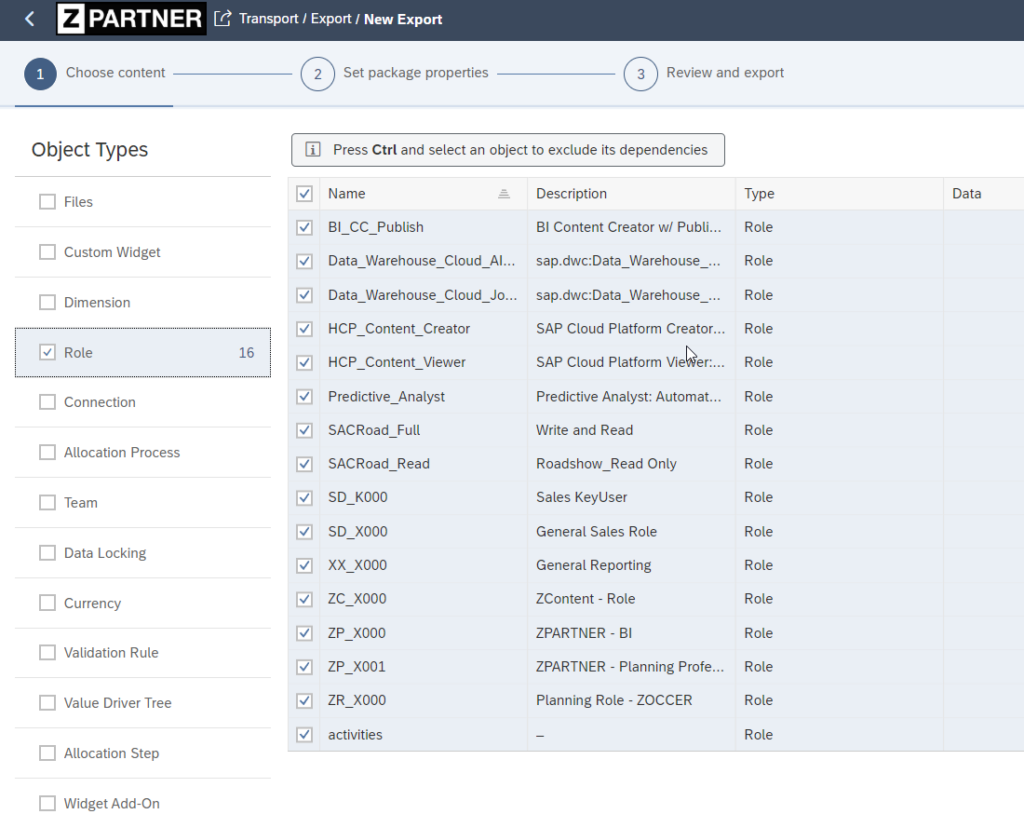
Exporting the content from the Source Tenant
On the Content Network Storage page, you have the option to export all roles to a package file.

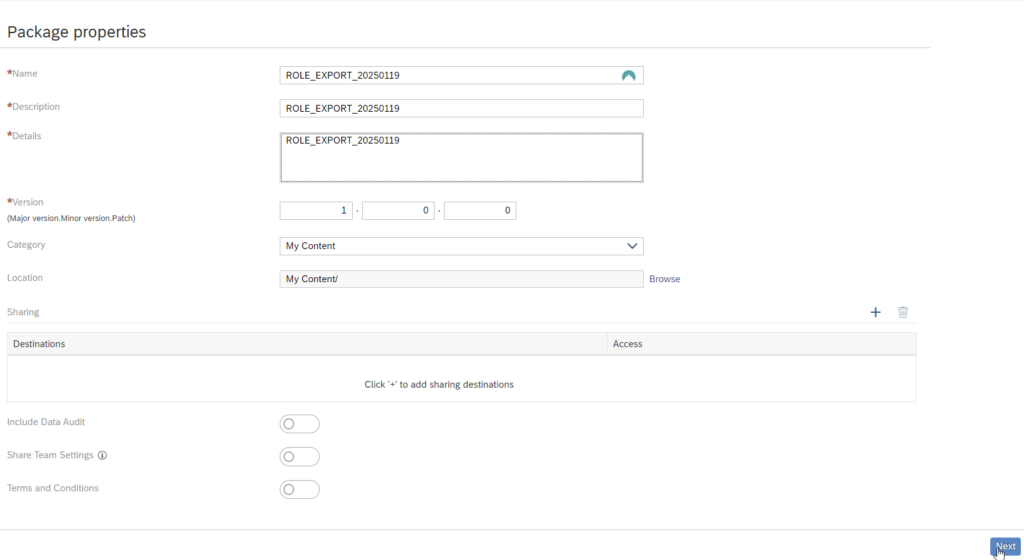
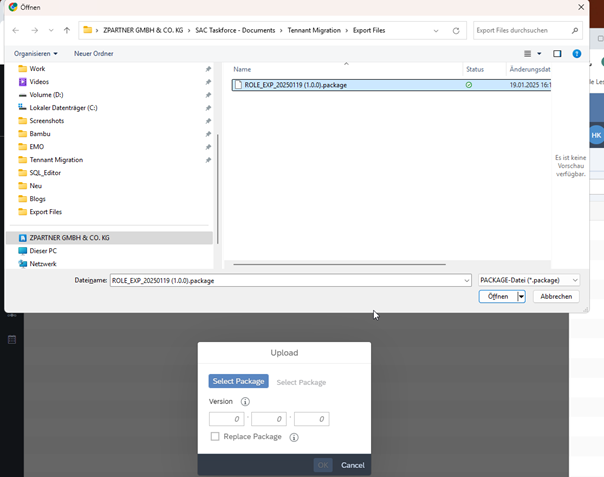
Import on Target tenant
On the target tenant we import the package with uploading the package file. This can also be done with the help of the content network.

Select package downloaded before and upload into the new tenant.

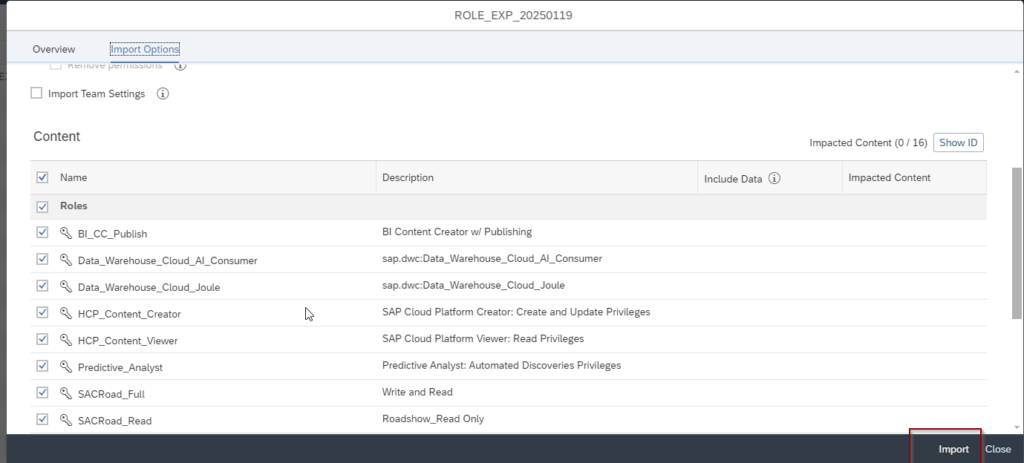
Import and check if all is selected.
5.3.3 :: 002 :: Users:
In order to move your current users to the new tenant we export the users to a csv file. We used that step to cleanup and do some housekeeping by removing test users and duplicates.
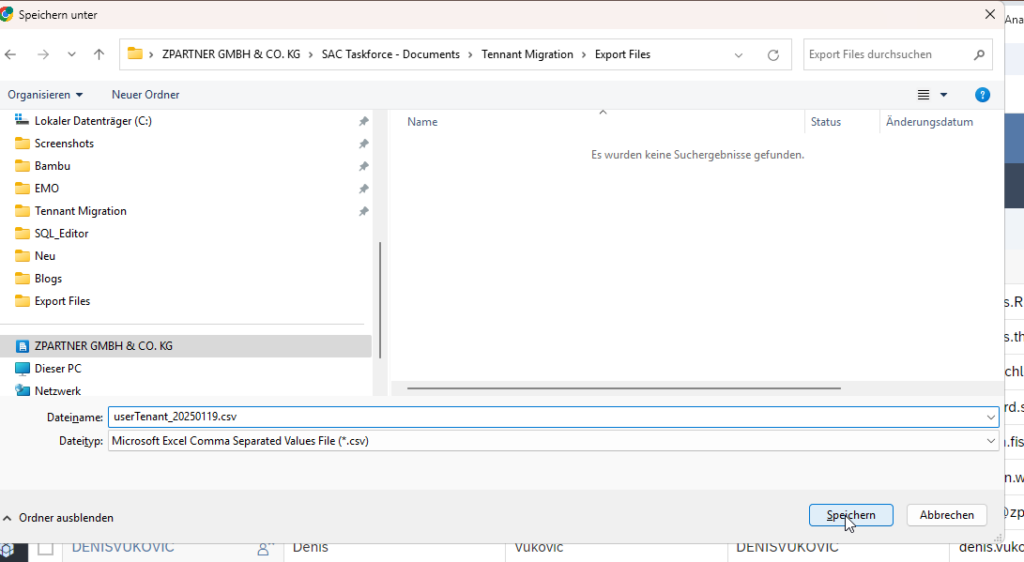
Export at old tenant
Exporting Users from the Old Tenant
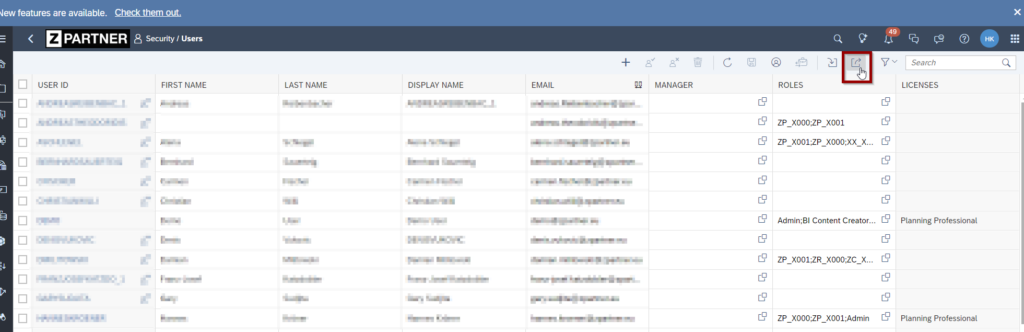
1. Navigate to Security > Users in the old tenant.
2. Export the user list as a CSV file.
3. Open the file in Excel and review its contents for accuracy.
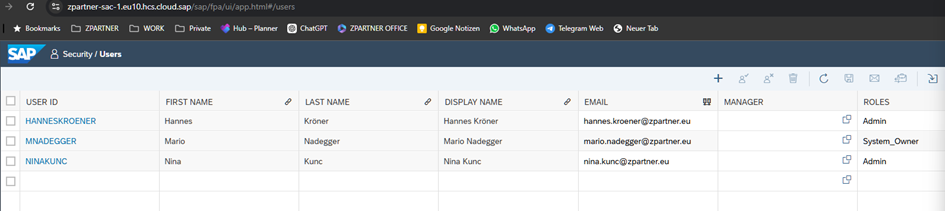
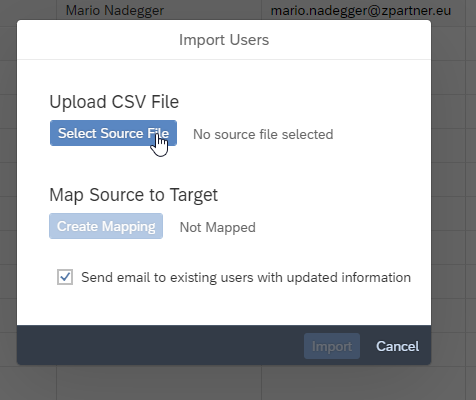
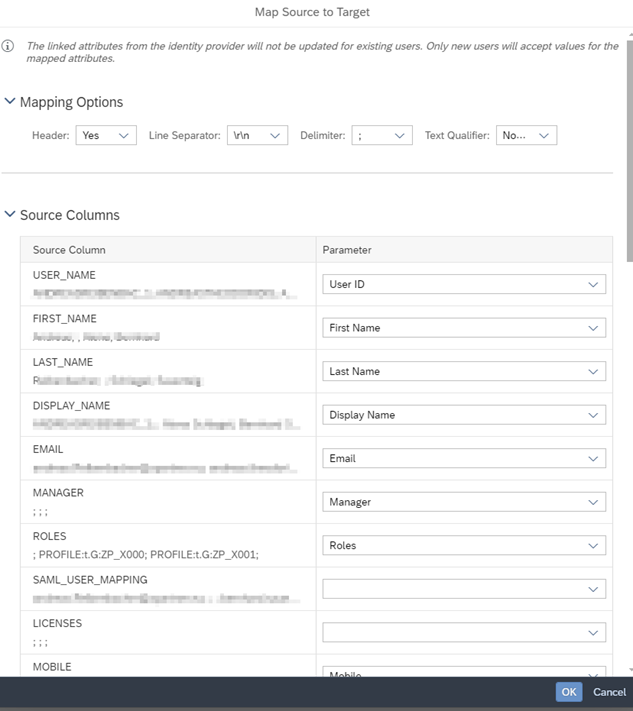
Import in new Tenant
Importing Users into the New Tenant
1. Navigate to Security > Users in the new tenant.
2. Upload the exported CSV file.
3. Handling Import Errors:
- If an error occurs because your user cannot be assigned a role, remove yourself from the export file and try again.
- If formatting issues arise, open the CSV in Excel, apply Text-to-Columns, and save it again as CSV.
- Retry the import process.

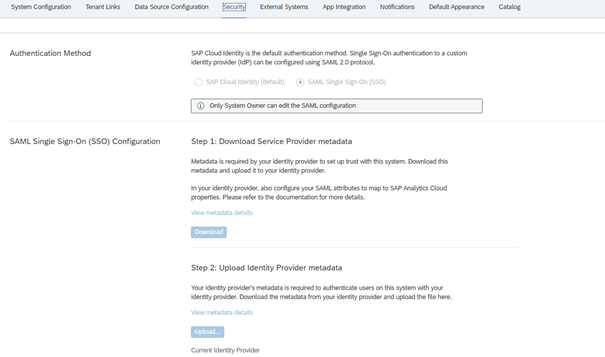
5.3.3 :: 003 :: Single-Sign-On (SSO)
To set up SSO on our new tenant, we mirror the settings from the source tenant followed again the instructions on https://help.sap.com/docs/CX_NG_SALES/ea5ff8b9460a43cb8765a3c07d3421fe/eceac5a75db64ddbb7afd524058a0a0c.html .
A user with full access to all connected systems is very helpful. Then this task was straightforward to complete.
To enable SSO, replicate the settings from the source tenant and follow SAP’s official guidelines.
SSO Setup Steps:
1. Mirror the SSO configurations from the source tenant.
2. Refer to SAP’s official guide: SAP SSO Documentation.
3. Assign an administrator with full system access to complete the setup.
4. Perform a test login to ensure SSO works correctly.
5.3.3 :: 004 :: Teams
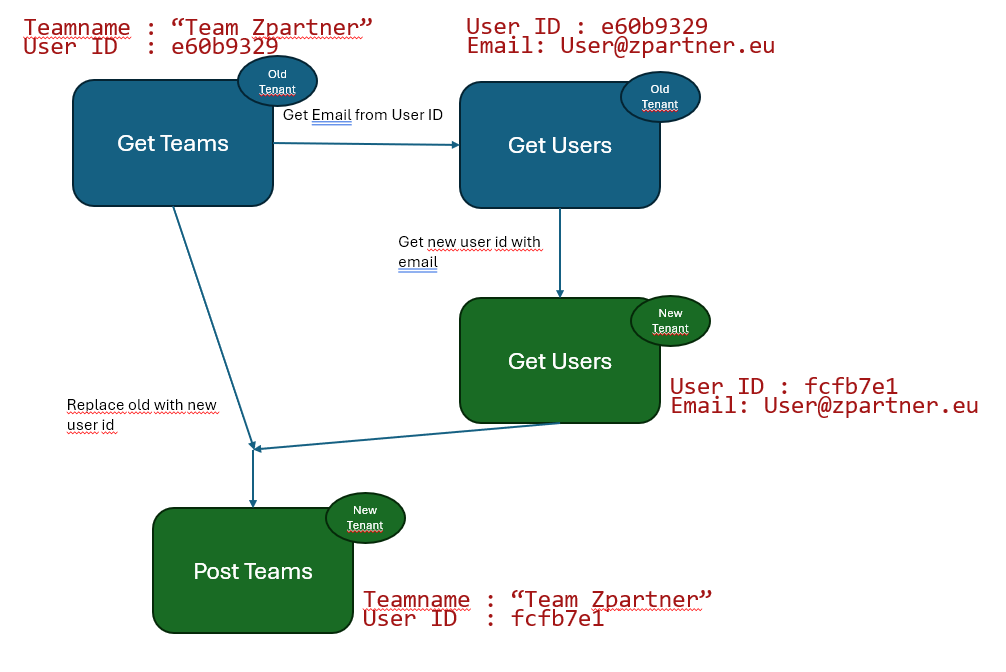
For teams there is no export/import possibility but an API to help with the migration. It’s unfortunately not straightforward as the newly imported users have different internal id’s in the new system. If you want to migrate not only your team names to the new tenant but also want to keep the user assignment we would need to do some lookups.
Challenges in Teams Migration:
- Newly imported users in the target tenant receive different internal IDs.
- There is no built-in Teams Export/Import function.
Solution: API-Based Migration
To streamline this process, an automated script helped us to migrate teams and assignments. This process is described in the following image.
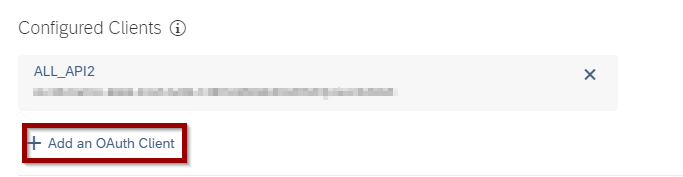
Step 1: Create an OAuth Client ( necessary in both tenants )
1. Navigate to Administration > App Integration.
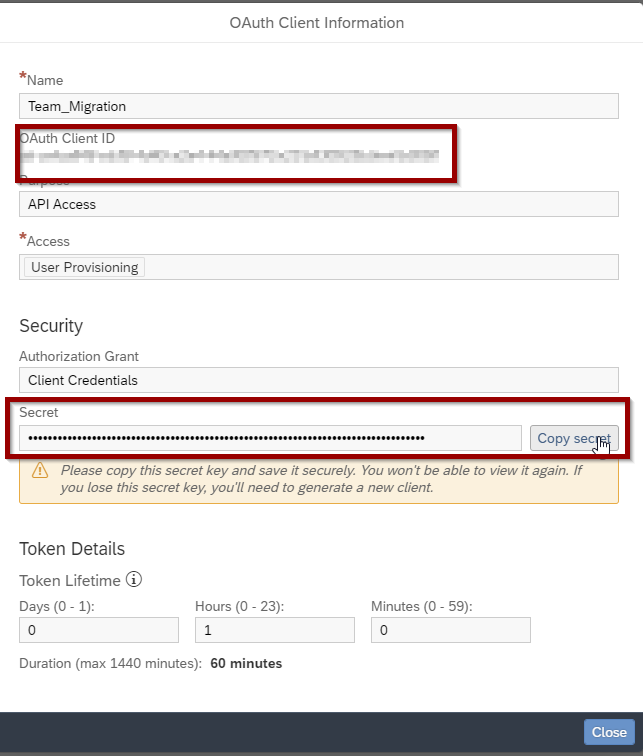
2. Create an OAuth Client with the following settings.
- Purpose = API Access
- Access = User Provisioning
3. Save the generated Client ID and Client Secret.

Step 2: Configure the Python Script
Modify the script by replacing placeholder values with your tenant’s specific URLs:
In the coding you just need to replace the configuration urls and Client id’s and Secret:
| token_url | Token_url ( look in Administration -> App Integration ) |
| crsf_url | Tenant_url /api/v1/csrf |
| users_url | Tenant_url /api/v1/scim2/Users |
| crsf_url | Tenant_url /api/v1/csrf |
| groups_url | Tenant_url /api/v1/scim2/Groups?count=100&filter=displayName ne \“StructuredAllocationRole_Admin\““ ( ONLY Source Tenant ) Currently only 100 Teams will be fetched, if you have more please adjust. |
| client_id | Oauth Client ID |
| client_secret | Oauth Client Secret |
| groups_post_url | Tenant_url /api/v1/scim2/Groups ( ONLY Target Tenant ) |
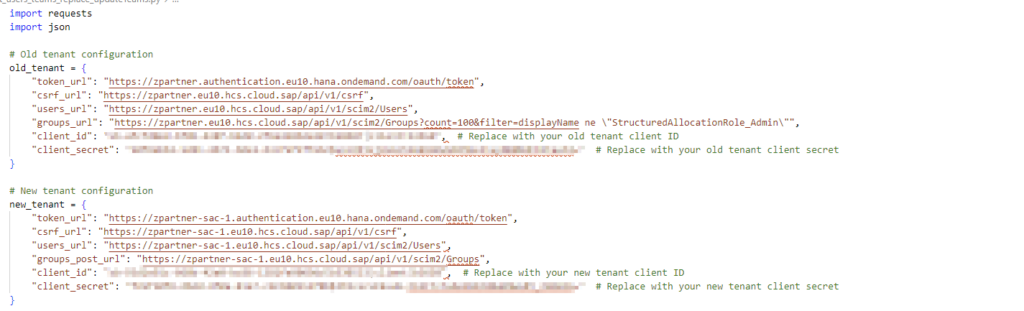
✅ Important: The group ‚StructuredAllocationRole_Admin‘ should be excluded due to an SAP bug.
https://github.com/zpartner/SACTeamSync
Step 3: Execute the Script
1. Run the script to fetch teams from the source tenant.
2. Match old user IDs with new user IDs.
3. Post the teams to the new tenant.
Conclusion
After approximately 5–6 hours, the security setup for our new SAC tenant was successfully completed.
Key Takeaways:
✔ Manual user setup is required before migration.
✔ CSV adjustments may be needed for user imports.
✔ SSO setup is quick if settings are mirrored.
✔ Teams require API-based migration speed up a lot but takes some time to implement (Feel free using scripts to optimize that step)
Now, we move to the next step: Migrating Content from the Source Tenant to the New Tenant 🚀.
Related Blogs
Author: Mario Nadegger
Mario Nadegger is a Managing Director and Business Intelligence Solution Architect, specializing in SAP Analytics Cloud (SAC). As a leading SAC expert, he has extensive experience in designing, implementing, and managing SAC solutions, including SAC Native Planning, reporting, and integration with SAP BW/4HANA. His strengths lie in strategic SAC architecture development, establishing design guidelines, and enterprise-wide SAC implementation. With his role as a managing director, he combines technical excellence with business leadership, driving innovative BI strategies. As an architect, team leader, and developer, he acts as a crucial bridge between IT and business, enabling digital transformation.