FIORI Development – Connect BAS to On-Premise System
1. Introduction
In the upcoming blog series, we will focus on Fiori application development, starting with the first part where we will establish the prerequisites for it. We’ll walk through the process of setting up a connection between the SAP Business Technology Platform, which includes the needed development environment, the BAS (Business Application Studio), and an S/4 HANA On-Premise system. This connection is required in order to consume data via OData from the On-Premise system in the development environment. It’s as well needed to deploy the applications from the Business Application Studio to the On-Premise system.
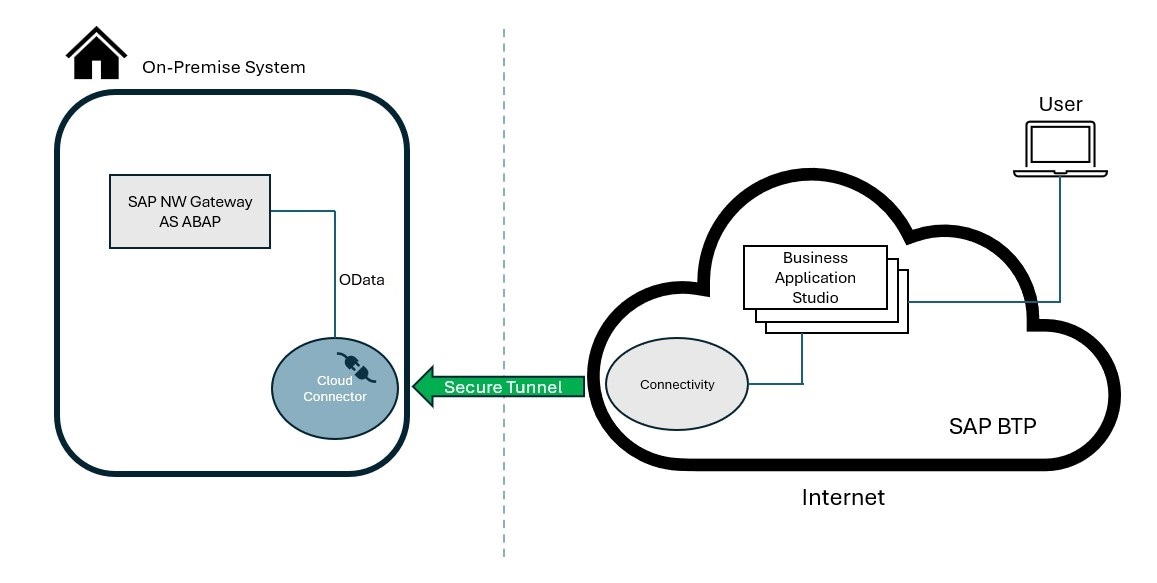
Here’s a rough picture including the architecture relevant for our scenario. We need access to the BTP, as the main development environment for SAP Fiori apps, the business application studio, is an integral part of it. For a secure connection to the S/4 On-Premise System we need an additional component in between, the SAP Cloud Connector.
2. Accessing the SAP Business Technology Platform
For our simulation we will create a trial account for the business technology platform.
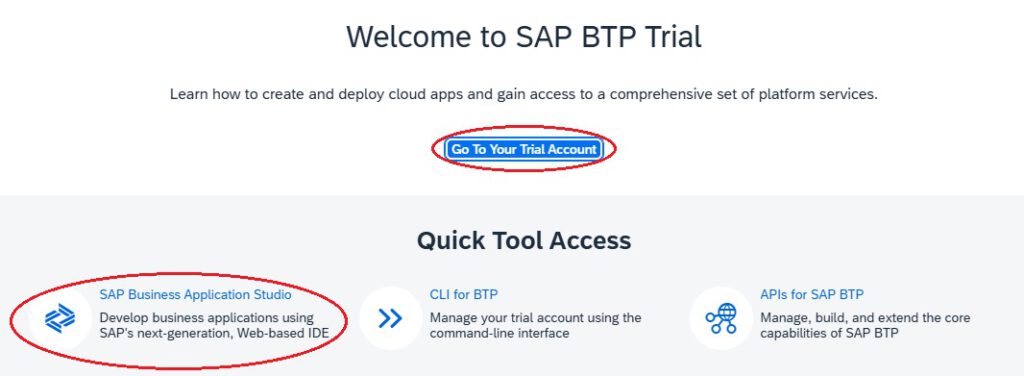
After the creation you can access your trial account from the welcome page. Additionally, you can also access the SAP Business Application Studio, which we will need in our next blog for the app development, from here.
3. Subaccount Creation
Since the BTP global accounts are organized in subaccounts, the next step is to create a subaccount. In the BTP Cockpit, navigate to the ‚Global Account‘ section. Here, you can create a new subaccount by selecting ‚Create‘ and then choosing ‚Subaccount.‘

Once it is created, it will appear in the Subaccount Explorer. You can see the subaccount listed under ‚Subaccounts.‘

4. Configuring Connectivity to the On-Premise System
The next step involves configuring the connectivity settings to your On-Premise SAP system.
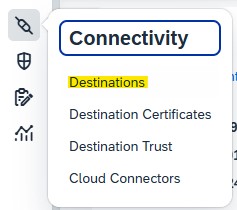
In your subaccount, navigate to the Connectivity section and select ‚Destinations.‘ This is where you will set up the connection parameters for your On-Premise system. Fill in the necessary details in the Destination Configuration form:
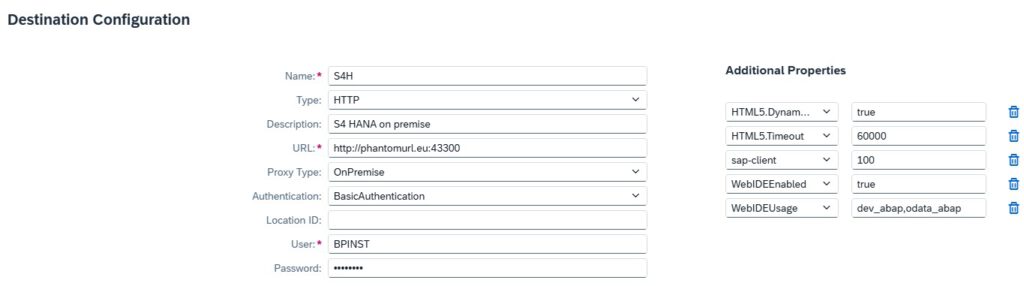
It is recommended by SAP not to use the real URL to the target system already here, but rather to use an imaginary URL and port. The mapping of this virtual URL to the real one is done in the cloud connector. It is also important to configure additional properties correctly to have the connection available for a proper use during development.
After configuring the destination, it will appear in the Destinations list:

Later we will use the ‚Check Connection‘ button to verify that the destination is reachable. At this moment the check cannot be successful, as the connection was not fully configured yet.
5. Configuration of the SAP Cloud Connector
The cloud connector can be centrally installed in your company network or locally installed on your workstation. In our scenario we will go for the installation on our local workstation. Please note, that the Cloud Connector automatically starts as a Windows Service with your operating system, so you do not need to manually start it each time.
Now, let’s configure the SAP Cloud Connector over the web interface https://localhost:8443
The Cloud Connector is managed by the user ‚Administrator‘ by default. Upon first login, you will be asked to change the initial password “manage”.
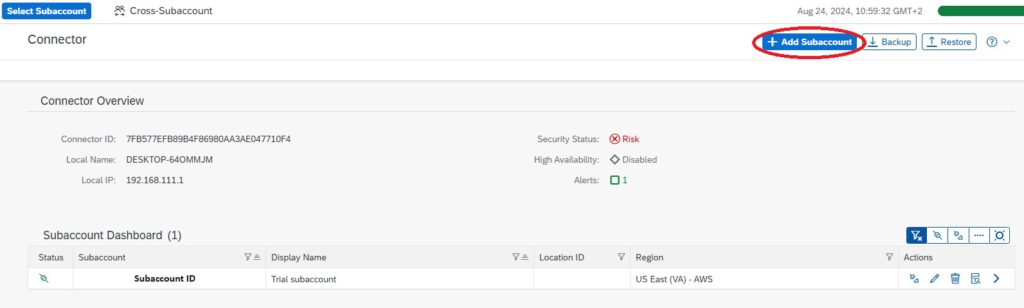
In the SAP Cloud Connector, select ‚Add Subaccount‘ and enter the required information to link your subaccount from BTP with the Cloud Connector.
Then choose “Cloud To On-Premise” and create a mapping between the virtual and internal system:
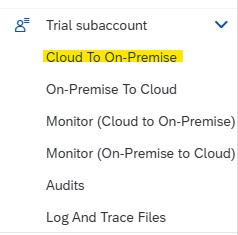
Configure the system mapping by specifying the internal host and port of your On-Premise system. The virtual host and port must match the ones specified in the BTP. This mapping is crucial for routing requests from the BTP to the backend system.

After configuring the system mapping, check if the system is reachable. A ‚Reachable‘ status indicates that your configuration is correct, and the system can be accessed from the Cloud Connector.

It’s also important to define which resources can be accessed via this connection in the backend system. In this case we will not make too strong restrictions and make sure that all services are accessible:

Now let’s get back to the BTP and check the connection from there:

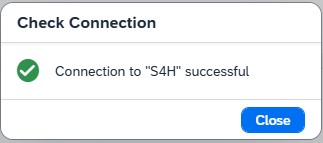
Now we have successfully established a connection from the BTP to the On-Premise system through the Cloud Connector, which is a prerequisite for consuming live data from the system in the BTP and make deployments from the Business Application Studio to the On-Premise system.
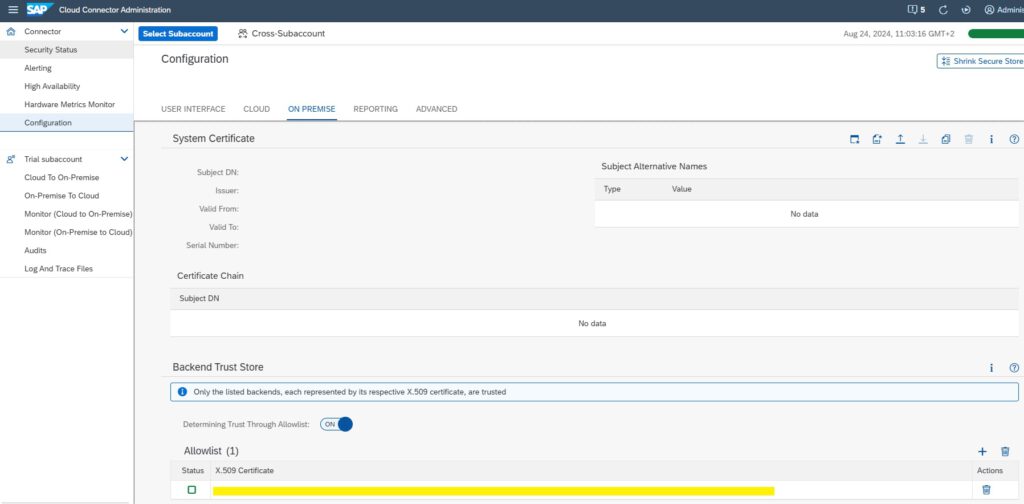
In the Cloud Connector you can also configure an Allowlist which ensures that only trusted backend systems, identified by their certificates, are allowed to connect to your subaccount. This adds an additional layer of security by restricting access to specified systems.
Navigate to the On-Premise tab in the Cloud Connector configuration and ensure that the option ‚Determining Trust Through Allowlist‘ is enabled for the Backend Trust Store.
Finally add the necessary certificates to the Allowlist. These certificates represent the backend systems that you wish to trust and connect to.
Conclusion and Outlook
By following these steps, you have established a working connection between SAP BTP and your On-Premise system, which can be leveraged to build and deploy powerful SAP Fiori applications with the Business Application Studio.
In the next part of this blog series, we will explore how to create a Fiori app and deploy it to the connected On-Premise system.