„Replace Model“ Feature in SAP Analytics Cloud with SAP BW Live Model
In the rapidly evolving world of data analytics, the agility to update and modify data sources directly within ongoing projects is crucial. SAP Analytics Cloud (SAC) offers a powerful feature known as „Replace Model,“ which allows users to swap out the underlying data model in a story without needing to rebuild the story from scratch. This functionality is not only a time-saver but also ensures that businesses can react quickly to changes in data or analysis requirements.
What is a Model in SAC?
Before diving into the replacement process, it’s important to understand what a model is within the context of SAP Analytics Cloud. A model in SAC acts as a framework for data that includes dimensions, measures, and data integration points. It serves as the backbone of any story, providing the necessary structure and data foundation.
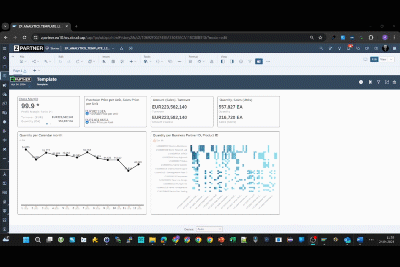
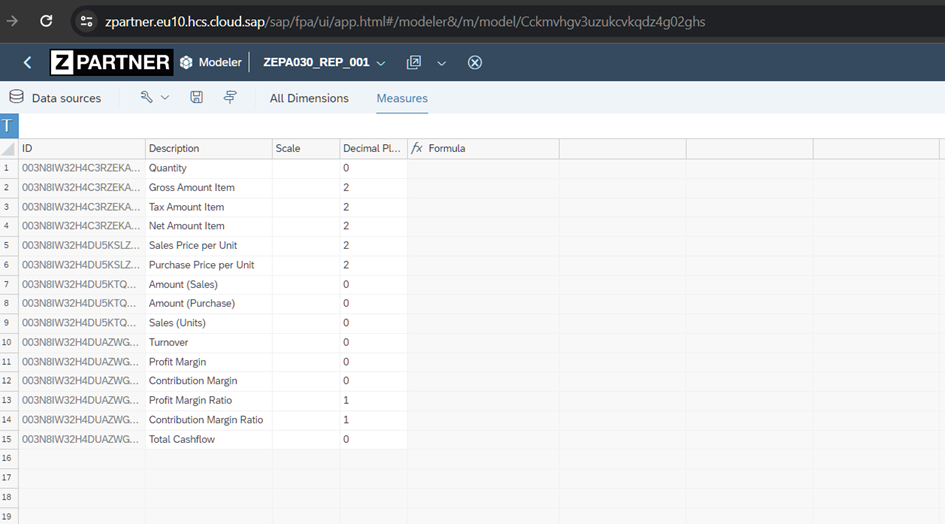
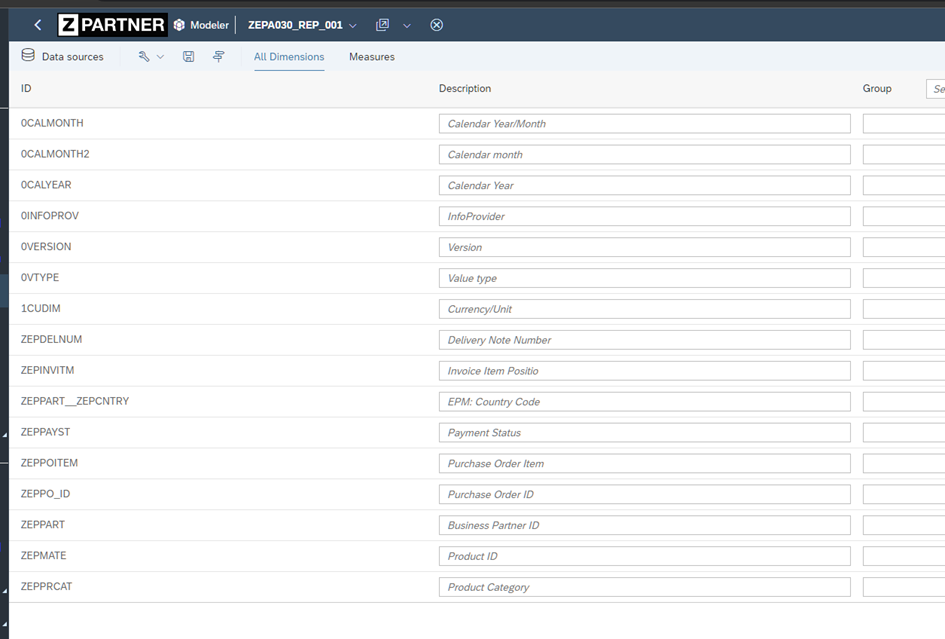
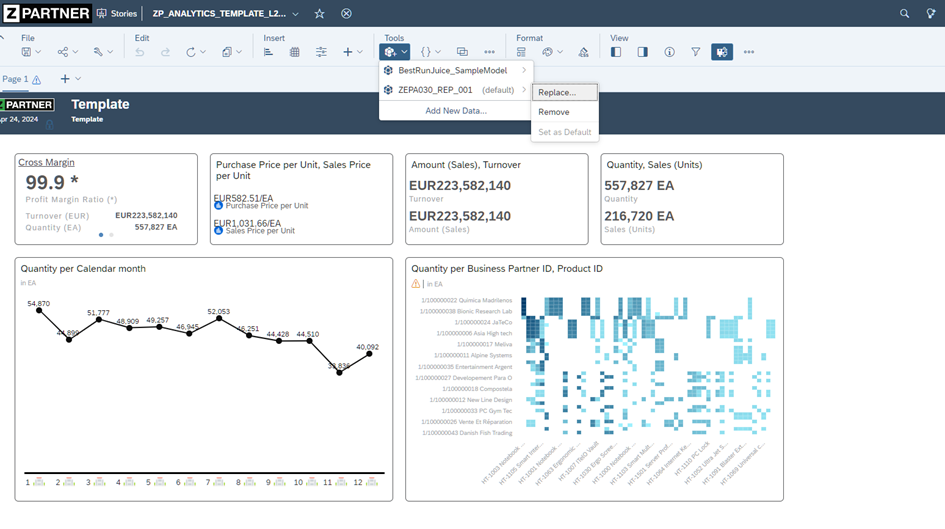
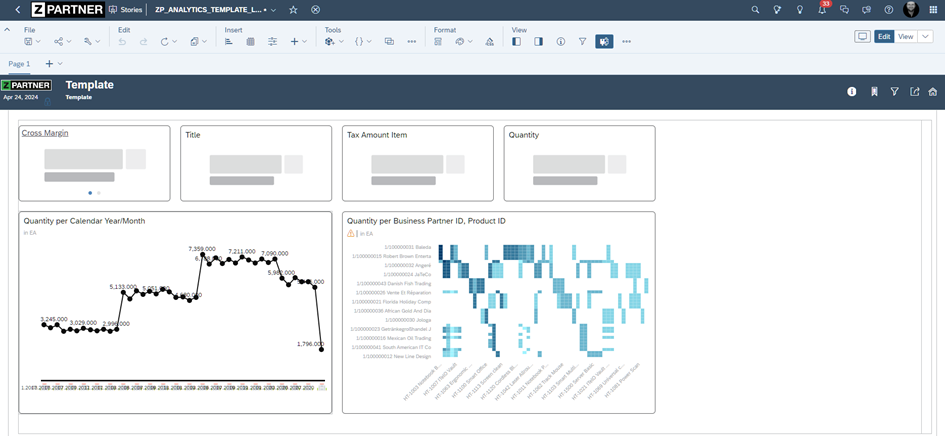
In our scenario we start with a model named ZEPA030_REP_001 based on a SAP BW Life Connection.
This model is the default model of an Story 2.0 including some charts and tables based on the model.

Why Replace a Model?
The need to replace a model can arise for several reasons:
- Updating Data Sources: As businesses evolve, so do their sources of data. Replacing a model allows for the integration of updated data without disrupting the existing analysis.
- Refining Data Structures: Changes in business requirements might necessitate a modification in the data structure, such as adding new dimensions or measures.
- Improving Performance: New models might be optimized better in terms of performance, making data retrieval and analysis faster and more efficient.
- Simple technical reasons due to new namings, new data models …
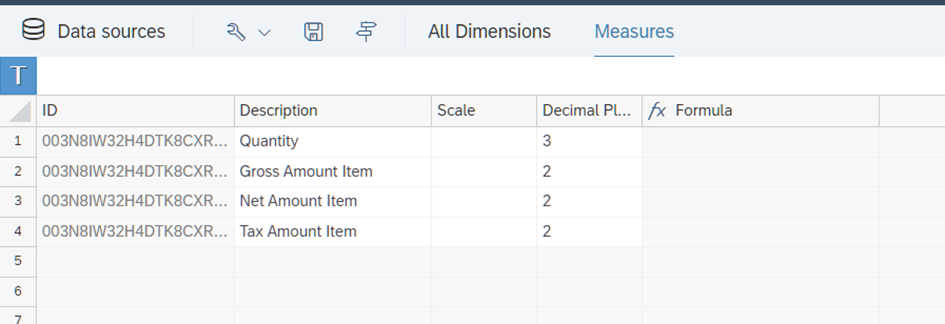
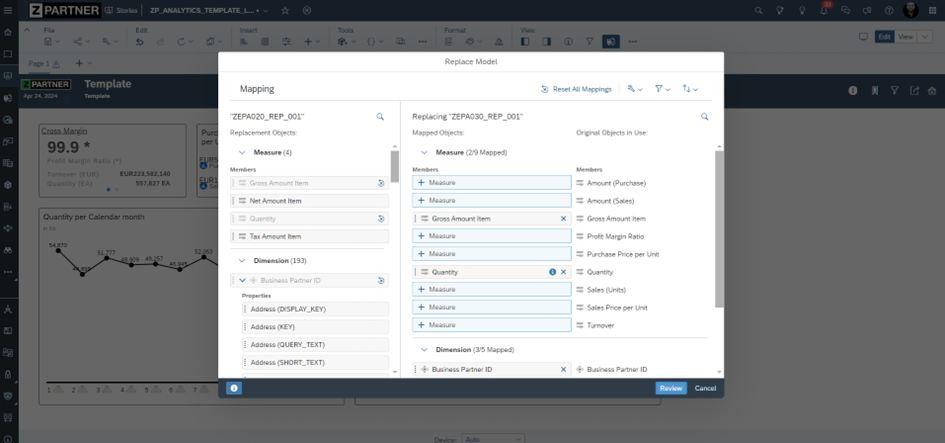
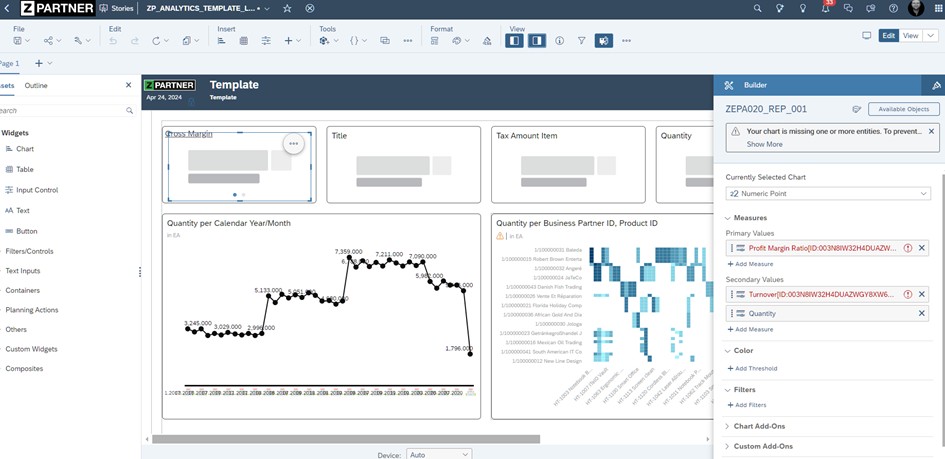
In our case we replace with a model named ZEPA020_REP_001. Compared to the original model it consists of different dimensions and measures.

Detailed Steps to Replace a Model in a SAC Story
Step 1: Open the Story
First, you need to navigate to the SAC main menu and select the specific story that requires updating. It’s crucial to ensure that you have the appropriate permissions to edit the story.
Step 2: Access Story Settings
Once the story is open, look for the ‚Edit‘ option, typically found in the toolbar at the top. Clicking on ‚Edit‘ will enable you to make changes to the story. Within the edit mode, find and select the ‚Model‘ tab from the menu options. This section allows you to view and modify the data model associated with the story.

Step 3: Choose Replace Model
Within the ‚Model‘ tab, there will be an option to ‚Replace Model.‘ Click on this to initiate the process. A dialog box will appear, listing all available models that can be integrated into your story. These models are those that you have access to and which are compatible with the data structure of your existing story.
Step 4: Map Dimensions and Measures
After selecting a new model, you will be prompted to map the dimensions and measures from the old model to the new one. This step is crucial to ensure that all your charts, tables, and other visual components in the story reflect the correct data:
- Map Dimensions: Align the dimensions (such as geographical data, time periods, product categories) from the old model to the corresponding dimensions in the new model. This ensures that the story’s context remains consistent.
- Map Measures: Similarly, align the measures (such as sales, revenue, customer counts) to the new model. Measures are quantitative data points that the visualizations in your story depend on.
This mapping must be done carefully to ensure data accuracy and relevance in your visualizations.
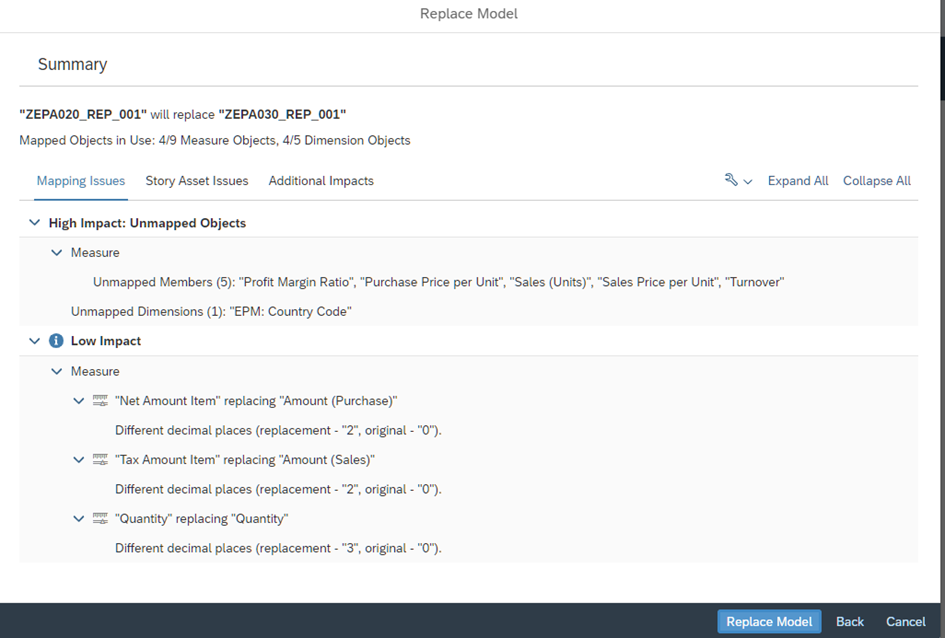
Check Summary on impact an replace.
Step 5: Validate and Save
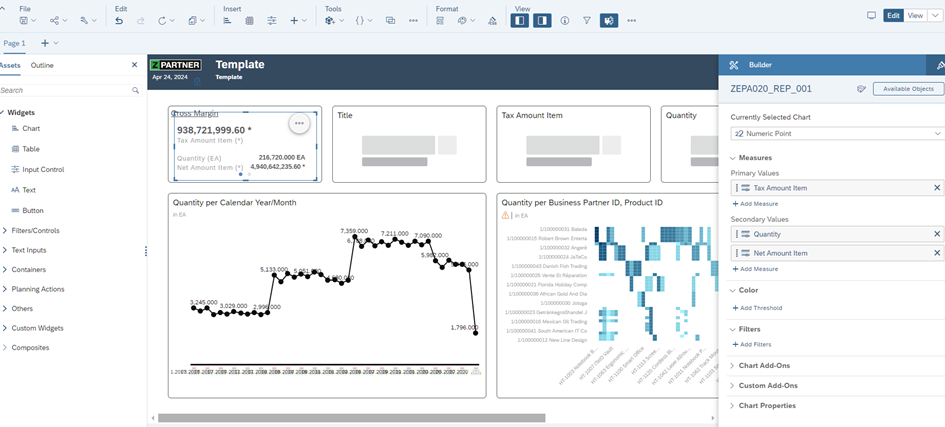
After remapping the dimensions and measures, SAC provides a preview to check if the visualizations render correctly with the new model. Review this carefully to ensure that all elements display as expected. If everything looks correct, proceed to save the changes. This step finalizes the model replacement and updates your story with the new model.
In our case some charts are not rendered due to missing key figures. Others are still working fine
Step 6: Review and Adjust
Post-replacement, it’s a good practice to review the entire story to ensure that all data interactions, filters, and calculated measures function correctly. Sometimes, replacing a model might require minor adjustments in how certain data points are calculated or visualized due to differences in the data structure or data processing logic between the old and new models.
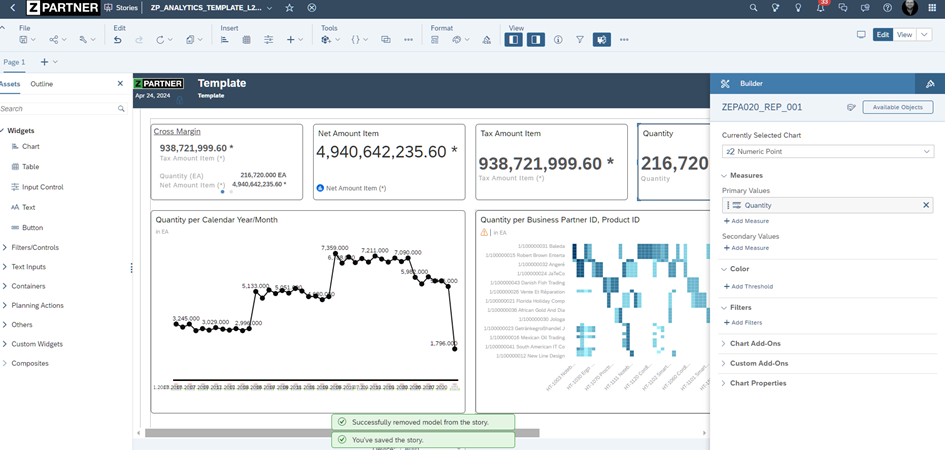
In our case some measures are no longer int the model and not mapped. We replace them by new ones.
Step 7: Validate and Save
Once the new model is in place and dimensions are mapped, validate the data to ensure everything is functioning as expected. Save the changes to finalize the replacement.
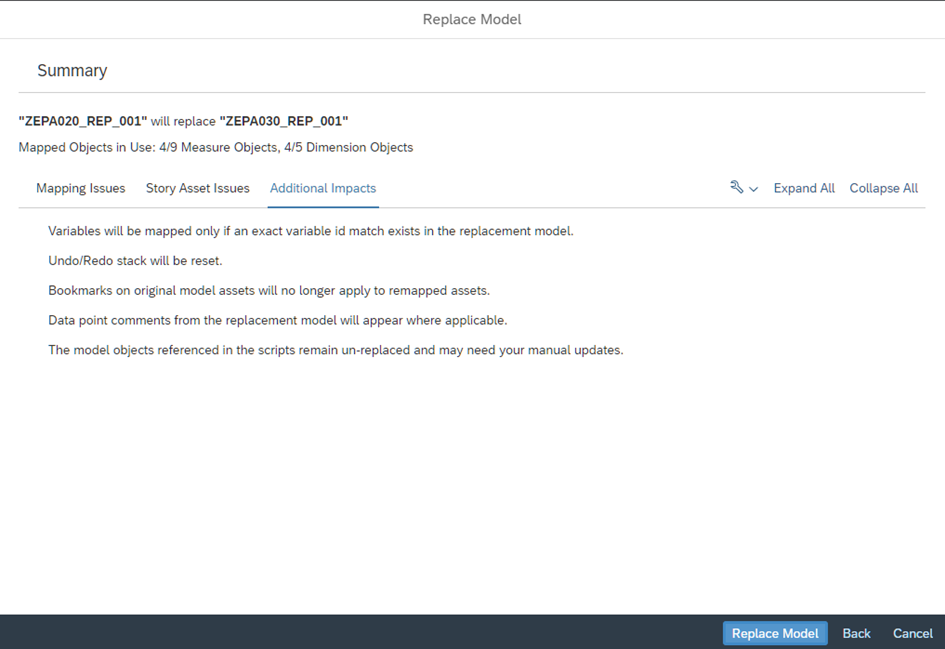
When saving the model you will be asked to remove the old model.
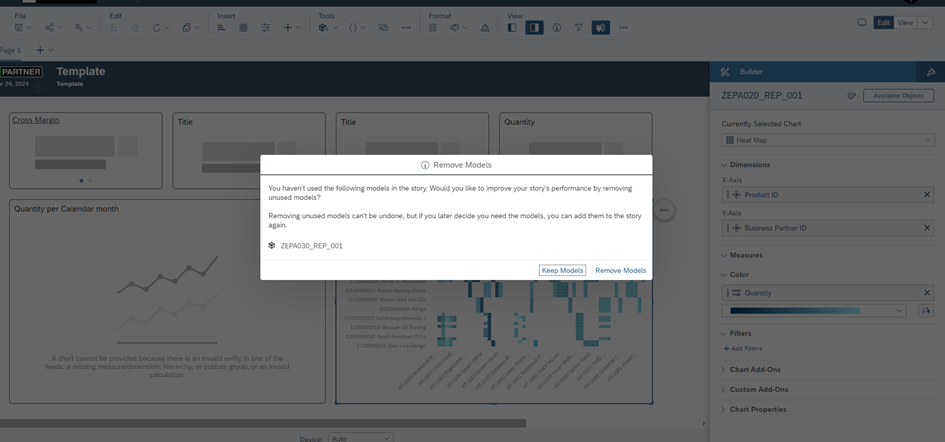
Best Practices
- Backup Your Story: Before making any changes, it’s wise to create a backup of your story to prevent data loss.
- Preparation of the New Model: Ensure the new model is fully prepared and tested in a separate environment before integrating it into an existing story.
- Replace model and read summary carefully. So you will reduce adaptations after replacement.
Conclusio
The ability to replace the data model in a story without needing to reconstruct it from scratch provides a very helpful feature saving time and helps to be flexible in terms of changes.
Further restrictions and roadmap item can be found under: https://roadmaps.sap.com/board?PRODUCT=67838200100800006884&q=replace&range=FIRST-LAST#;INNO=57EA73B3B1E91EEE8E8BB2F9E519B05B